Shading in Blender
Shading
Shading is the process of finding the color and brightness of each part of a 3D object (or a 2D drawing) based on how light interacts with it. Basically how computer find out how "bright / dark and what color should this particular pixel be" for every single pixel. Obviously for 3D space it is extremely complex.
Multiple factors come into play:
- Light source in the scene: Where does the light come from?
- Surface orientation: Which way is the surface facing? Surface is determined using normals (invisible line perpendicular to the surface)
- Material properties: Is the surface matte? Shiny? Metal?
- Viewer / Camera angel: Sometimes what you see changes depending on where you're looking from
All this basically results in gradients of light and shadow that gives you illusion of depth, curvature, and texture to a 3D object that you see on a screen.
So say a red ball is in sunlight: The side facing the sun is bright red, the opposite side is dark / reddish, and you're able to see that smooth transition in between, being able to see that transition is shading! Without shading you would just see a flat 2D circle.
Type of Basic Shading in 3D
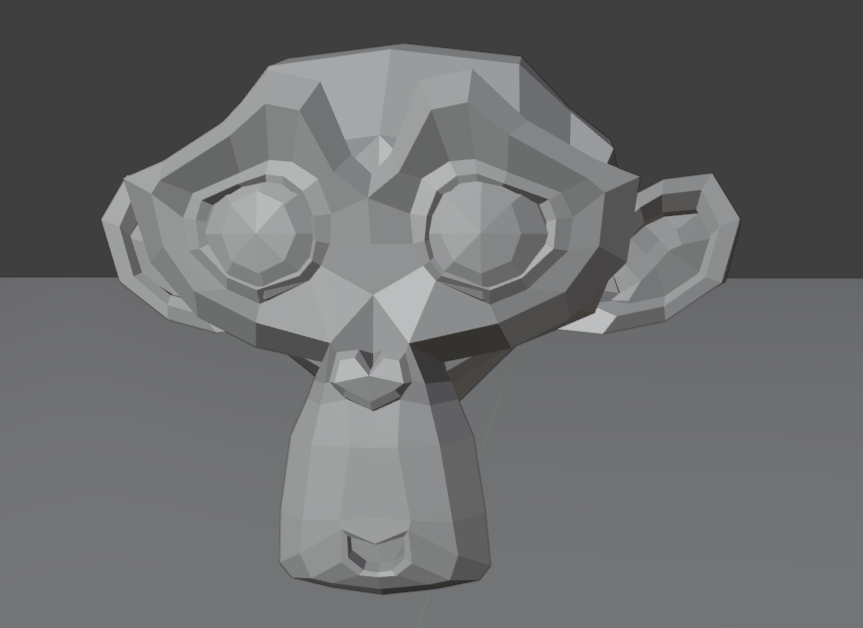
So when you use Blender other other Polygonal 3D programs, models are made up of faces, vertices and edges as well. But what you actually see are the faces. If you take a look at the faces by themselves, they are by nature very flat. You can see that as soon as you load in the monkey model. You can clearly see each of the individual faces on the object. Of course in real life this isn't how it works because things are smooth and rounded object that exist all around us.
Flat Shading
This is the default shading method when you open up blender and start modeling. Flat shading is by definition flat, each face is assigned one color. Flat shading are great for low polygon cartoon character for games. Schedule 1 for example.
Smooth Shading
One of the ways that we can make object smooth is by using Subdivision. This splits up each of the faces on your model into smaller faces which smooths out the edges, and the higher the level of subdivision you assign the smoother your model will look. But if you zoom in you will still see the individual faces showing! And since subdivision adds physical faces to your scene adding more and more subdivision to your model will eventually crash your computer hence it isn't ideal!
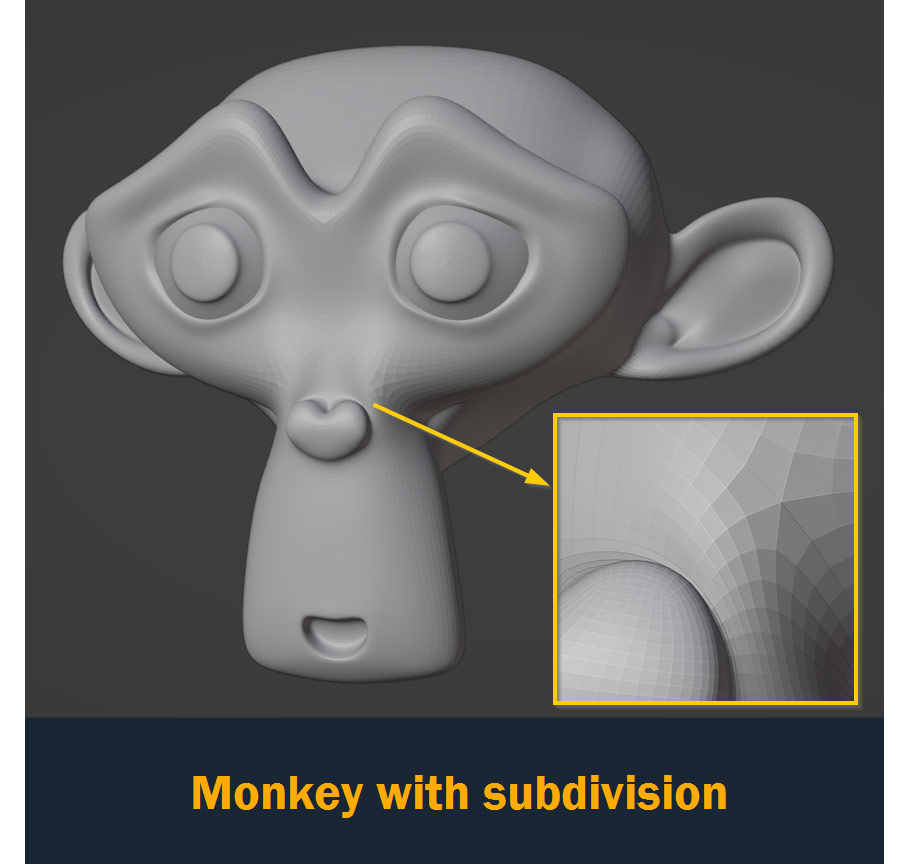
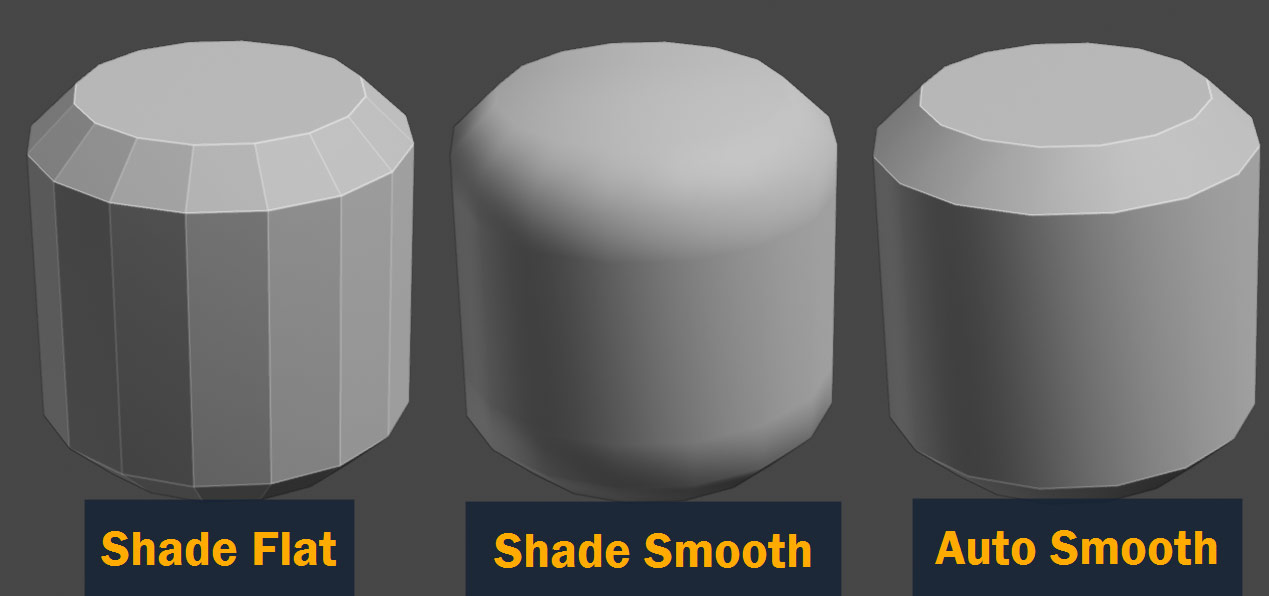
The better solution would be to use smooth shading! Smooth shading makes your model look smooth without actually adding or changing any of the faces on the mesh. It does that by using efficient algorithms to average the lighting across the faces on your model giving you the illusion of a perfectly smooth, soft surface.
Smooth shading works on any 3D model, no matter how sharp the angels are in reality which make them really powerful!
The slight difference between Shade Smooth and Shade Auto Smooth is that, Shade Smooth will smooth shade all faces, auto smooth on the other hand will only smooth edges with angle of less than 30 degrees.
Toon / Cel Shading
This is what I want to learn.
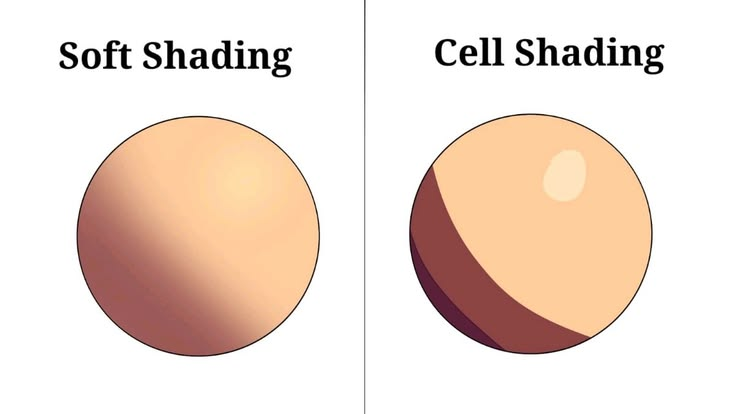
Notice that all of the previous shading methods provides gradient to the light, you can see there is transition between light and shadow. Toon shading is a stylized way of shading which makes 3D object look like 2D by avoiding those gradients. It deliberately use flat color with sharp transitions between the light and shadow areas. You can see distinct area of the transition rather than seeing a gradient.
No comments to display
No comments to display