React Core Concepts
Core Concepts
You will need to be familiar with three core concepts with React in order to build React applications.
Components
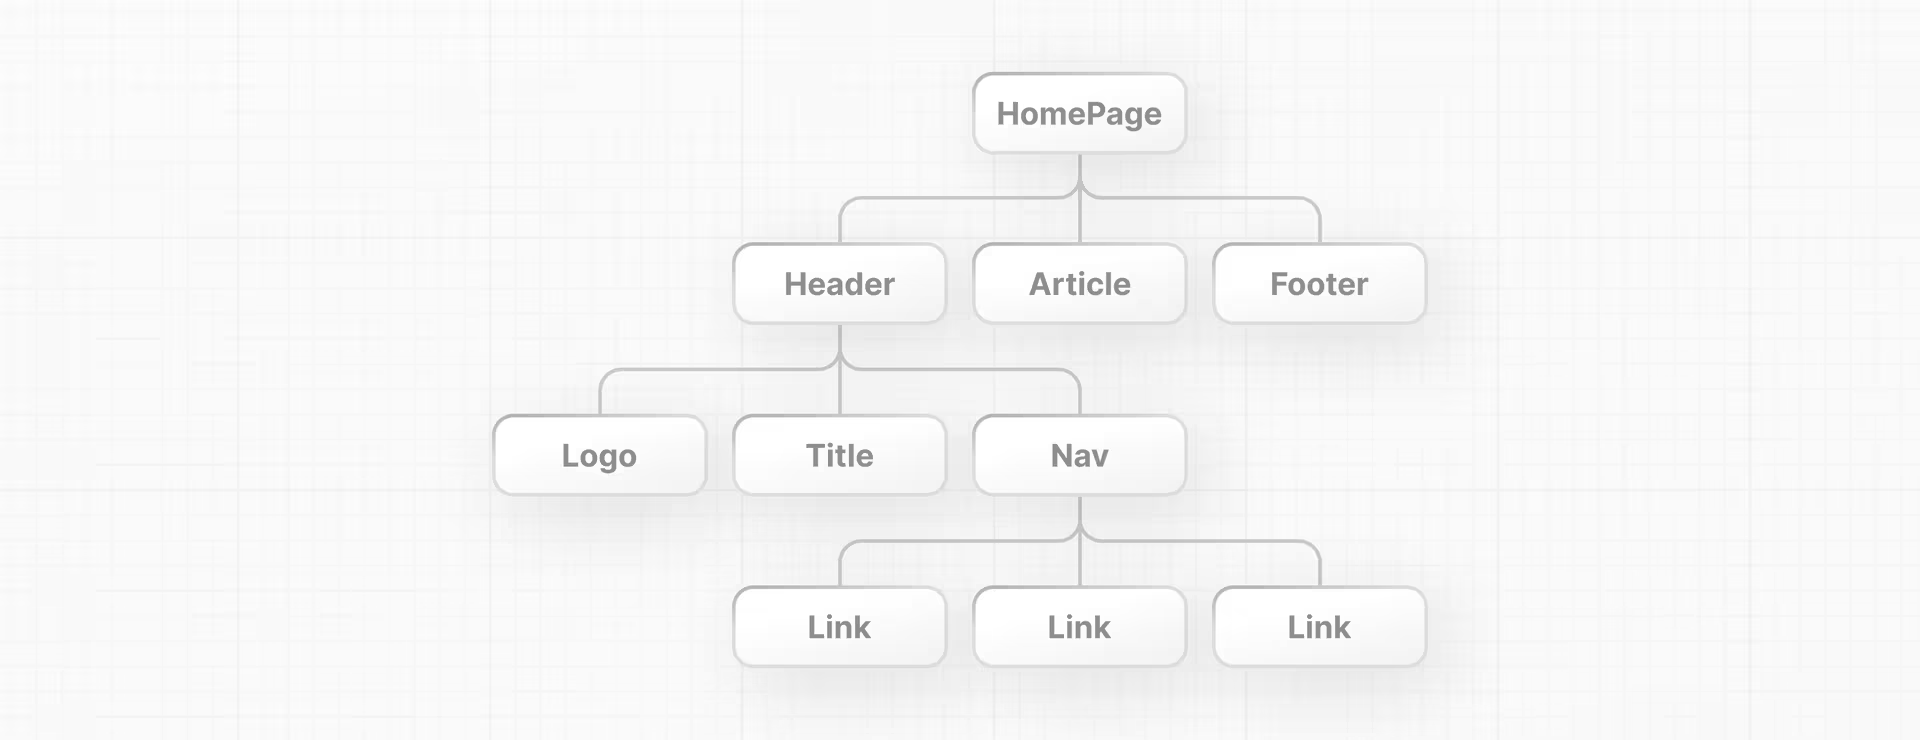
User interface can be broken down into building blocks called components.
Think of it like a self contained, reusable snippet of code. You can compose them with different components that you have write to create a bigger component for your React application!

Having components allows your code to also be maintainable, you can add, update, delete components without touching the rest of the application.
Creating a Component
In React, components are just functions, a function that returns UI elements. So a simplest component would be:
function header() {
  return <h1>Hello World!</h1>;
}
And using it in our CDN provided React application would just be:
<html>
    <body>
        <div id="app"></div>
        <script src="https://unpkg.com/react@18/umd/react.development.js"></script>
        <script src="https://unpkg.com/react-dom@18/umd/react-dom.development.js"></script>
        <script src="https://unpkg.com/@babel/standalone/babel.min.js"></script>
        <script type="text/jsx">

            function header() {
                return <h1>Hello World from a component!</h1>;
            }

            const app = document.getElementById("app");
            const root = ReactDOM.createRoot(app);
            root.render(header);
        </script>
    </body>
</html>
Sadly, this doesn't work because there are couple of nuances
- First, a component name needs to be Capitalized in order to distinguish them from plain HTML and JavaScript. So instead of header it will need to be Header
- Second, when you are using a component you will need to surround them with
<>so that JSX can kick in and compile them intoreact.createElement. If you're interested to learn more about JSX, you can look at this page.
With that being said, if you now make the minor adjustments:
<html>
    <body>
        <div id="app"></div>
        <script src="https://unpkg.com/react@18/umd/react.development.js"></script>
        <script src="https://unpkg.com/react-dom@18/umd/react-dom.development.js"></script>
        <script src="https://unpkg.com/@babel/standalone/babel.min.js"></script>
        <script type="text/jsx">

            function Header() {
                return <h1>Hello World from a component!</h1>;
            }

            const app = document.getElementById("app");
            const root = ReactDOM.createRoot(app);
            root.render(<Header />);
        </script>
    </body>
</html>
This will now work perfectly!
Expanding on Component by Nesting!
You can now create new component by nesting in other components!
Take the following for example, although a bit uncreative, we can create a new component called TwoHeader that have the two Header component nested in. When you render only the TwoHeader component you will be able to see two Header component on the page! Neat right?
One thing to call out is that a component must return HTML elements in a wrapper node. Meaning, there must be one parent node that you're returning. If you want to return say multiple HTML elements for a component, you must wrap them under a div OR use JSX fragments. Fragments
<html>
    <body>
        <div id="app"></div>
        <script src="https://unpkg.com/react@18/umd/react.development.js"></script>
        <script src="https://unpkg.com/react-dom@18/umd/react-dom.development.js"></script>
        <script src="https://unpkg.com/@babel/standalone/babel.min.js"></script>
        <script type="text/jsx">

            function Header() {
                return <h1>Hello World from a component!</h1>;
            }

            function TwoHeader() {
                return <div>
                    <Header />
                    <Header />
                </div>
            }

            const app = document.getElementById("app");
            const root = ReactDOM.createRoot(app);
            root.render(<TwoHeader />);
        </script>
    </body>
</html>
You can continue building more component and creating nested component to build more complicated components.
Passing Props
Now, we have learned how to create a component, we need to add some variety into the mix right? Otherwise, the component would be displaying the same thing everything. We can try changing up the color, the text that it shows on the component.
We can do that with props! Or properties!
In order to pass prop to your component you can just add it as an attribute to where you're using the component, for example, if we are reusing the TwoHeader component we have discussed earlier:
root.render(<TwoHeader text="Wowzers"/>);You can then accept access the argument that's passed by using the parameter props for example. props will be an object with the text key-value pair.
function TwoHeader(props) {
    // { text: "wowzers" }
    return <div>
        <Header text={props.text} />
        <Header text={props.text} />
    </div>
}
You can then access the key-value pair by using the dot notation or if you would also like you can do object deconstruction to take out the text key-value pair.
Additionally you also see the {} symbols used within the JSX expression. It is used to interpolate JavaScript code within the JSX expression, so that you can access the variable otherwise, JSX will just interpret it as a literal string.
You can call functions or do template literals to return a value within the JSX expression!
function TwoHeader({text}) {
    return <div>
        <Header text={text} />
        <Header text={text} />
    </div>
}
States and Event Handlers
You would want to make your web application interactive right? Otherwise, it would be boring to have nothing for the user to interact when you display your web page to your clients.
You can add interactivity through state and event handlers!
For example, say you would like to add a button that when you click will act as a Like button. The following component will print out the text "The user clicked the like button!" in the console whenever you click on the Like button.
export default function Content() {

    function handleClick() {
        console.log("The user clicked the like button!");
    }

    return (
        <div>
            <p>Cute Cat Pictures</p>
            <button onClick={handleClick}>Like</button>
        </div>
    )
}
We can improve this by adding state. States holds data or information about a component that can change over time. When a state of a component changes, the component is re-render the component in order to show that the component has a new state automatically by the React framework. This is fundamental to making your UI design dynamic and reactive to the user's input.
You can create a new state by calling the useState function in your project which returns an array of two object. The first value is the state itself which contains the value that you're storing, while the second value is the setter function that you use in order to update the state.
The reason why that you have to go through the setter to update the state value is because that's how React knows when to re-render the component, by you calling the setter it will know that "Oh the state is changing because the setter function is called". Technically there is nothing stopping you from just updating the state value, but then React wouldn't know that it needs to re-render the component to show that there has been an update to the component.
You can access the value through array destructuring.
let [likes, setLikes] = React.useState(0);Updating the example that we had: Now that we are able to keep track of the amount of likes that has been gathered by the user. If you really like the picture!
export default function Content() {

    let [likes, setLikes] = React.useState(0);

    function handleClick() {
        console.log("The user clicked the like button!");
        setLikes(likes + 1);
    }

    return (
        <div>
            <p>The amount of likes are {likes}</p>
            <button onClick={handleClick}>Like</button>
        </div>
    )
}
States refreshes after a browser refresh, if you want to persist any values then you would need to leverage browser storage or other form of data storage methods.
No comments to display
No comments to display